Tag Archives: recipe

Son of a Grits

Grits & Greens with Bacon

Somewhere in the South a brilliant lady came up with the term ‘Girls raised in the South – GRITS. Grits are raised with a little bit of a heavier burden carrying on the traditions of their southern roots. One of the most important is being a good southern mama. I never quite fully understood the role of a good southern mama until my son was born and boy do I have some big shoes to fill!

My son is 11 months old and exploring new foods everyday. He is very independent, insistent on feeding himself at every meal. This week we have tried scrambled eggs, grown up oatmeal and of course, grits. I was nervous as I lifted the big spoonful of grits to his mouth but he ate them and then smiled wanting more. I breathed a sigh of relief and thought to myself – son of a grits!

Recipe:

Grits, quick cooking – follow directions for 6 servings

3 slices bacon

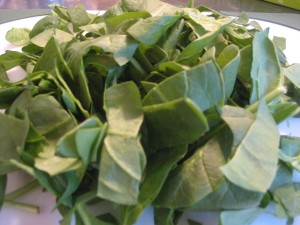
2 cups spinach, rough chopped – about 2 large handfuls

1/2 cup low-fat or 2% cheddar cheese

2 tbsp parmesan cheese, grated

1/4 tsp garlic powder

cayenne pepper to taste

salt and pepper to taste

4 eggs

Cook grits according to package directions for 6 servings.

Cook 3 slices of bacon in a large pan, let drain on a paper towel and then wipe excess fat out of pan leaving just a light coating.

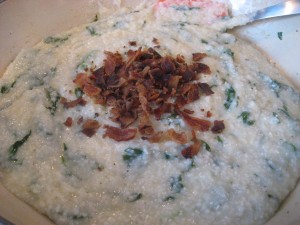
Heat pan to medium heat, toss in spinach, season with salt and pepper and cook for about a minute. Add grits to spinach, then stir in cheeses, garlic powder, cayenne and re-season with salt and pepper if needed. Let cheeses melt, then stir in crumbled bacon. Turn to a low heat to keep warm.

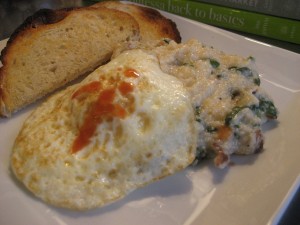
Fry four eggs to desired doneness. I like mine to be slightly runny. Grits should have a creamy consistency – add a little milk if they have gotten a little sticky.

Serve a fried egg on top of grits and top off with a dash of hot sauce.

Notes:

This is really quick and easy breakfast, lunch or dinner. If you have leftover grits just reheat and add a little milk to get back the creamy consistency.

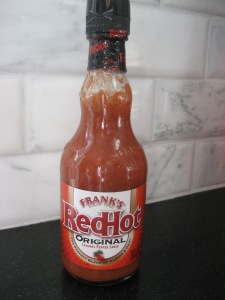
I prefer Frank’s Red Hot sauce. I add it to a lot of my recipes.

Sugar and Strawberries

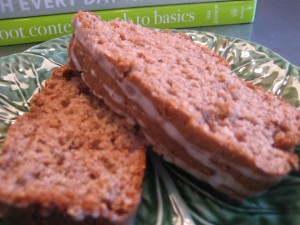
Strawberry Bread

Sugar is not my friend and oh how I love cakes, cookies and pies but they do not love me back. Anyone that know’s me well knows that when crisis strikes, I can solve anything with a cookie in hand. I’ve had a terrible sweet tooth all of my life. I remember being 5 years old, scaling the cabinets in our kitchen looking for chocolate. Not having much luck finding a Hershey bar, I ran across baker’s chocolate and yes, I ate it.

Shopping while starving at Costco a few weeks ago, I wound up with 6 pound bag of frozen strawberries. While my intent was smoothies for months, my sweet tooth got the better of me and I had visions of a giant strawberry cake with cream cheese icing, which was always my birthday cake of choice. I came up with a delicious strawberry bread that will beat out a cake craving any day.

Recipe:

1 cup all-purpose flour

1/2 cup whole wheat flour

1 tsp cinnamon

1/4 tsp salt

1/4 tsp baking soda

1 tsp baking powder

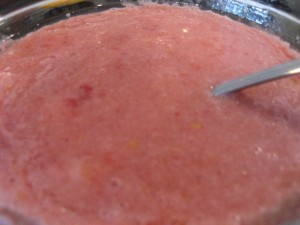
2 cups fresh or frozen strawberries, pureed

1/2 cup sugar

1 egg

1/3 cup applesauce, no sugar added

1/4 cup canola oil

1 tsp vanilla extract

1 tsp lemon zest

Preheat oven to 350 degrees.

If using frozen strawberries, let defrost before processing in blender.

In a large mixing bowl combine flours, cinnamon, salt, baking soda and baking powder.

In another bowl combine strawberry puree, sugar, applesauce, oil, egg, vanilla and lemon zest.

Pour wet ingredients into dry ingredients and fold together. Do not overstir.

Pour into a loaf pan sprayed with oil or cooking spray and bake for 50-55 minutes. A knife will come out clean in the center of the bread when it is done.

Let cake cool for 30 minutes before drizzling the glaze over the bread.

For Glaze:

3 tbsp powdered sugar

1 tbsp fresh lemon juice

Whisk together until smooth. Let bread cool for 3o minutes and then drizzle on the bread.

Notes:

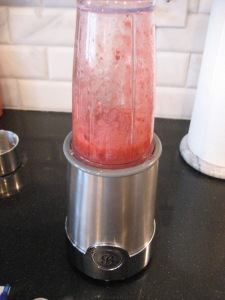
One kitchen tool I love and use all the time is my rocket blender. I got this Bella Cucina rocket blender at  Macy’s for around $30. It is great for making salad dressing, smoothies and sauces. It comes with three different blending cups, two blade choices and several lids.


Spaghetti – Oh!

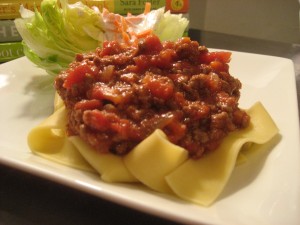
Bolognese with Pappardelle

Last week I was watching Top Chef All Stars and realized how much I love a good plate of spaghetti! They were cooking a traditional Italian meal in the kitchen of Rao’s in New York City. My granny’s kitchen is a long way from Rao’s but I swear her spaghetti and meatballs could go toe to toe with theirs any day.

Each year for my birthday, she would make my favorites, spaghetti and meatballs and a strawberry cake. We would spend hours in the kitchen perfecting those meatballs, letting them slowly simmer in a big pot of sauce and one thing that all good Southern and Italian cooks know is that food cooked with love is just – better food!

Recipe:

1 tbsp olive oil

1/4 cup carrots, finely diced

1/2 cup onions, chopped

2 garlic cloves, minced

1 lb lean ground beef

28 oz can crushed tomatoes

1 cup low-sodium beef broth

1/2 cup milk

2 tsp sugar

1 tbsp half and half

salt and pepper

Heat oil in a large, heavy pan over medium to medium-high heat. Add onions and carrots cooking until tender. About 5 minutes. Add garlic and cook for a minute more. Add ground beef, season generously with salt and pepper and continue cooking until no longer pink.

Add broth, bring to a steady simmer, continue cooking until almost all of broth has cooked away. Stir in milk, simmer and let most of the liquid cook away. Then add crushed tomatoes, sugar and season with more salt and pepper if needed. Let sauce simmer for 30 minutes or so. Just before serving, stir in half and half.

Serve with pappardelle or your favorite pasta and a crisp green salad. Here’s a recipe for a quick creamy herb salad dressing perfect on a simple wedge of iceberg.

Creamy Herb Dressing

1/4 cup Fage 0% greek yogurt

1 tbsp light sour cream

1 tbsp red wine vinegar

1 tsp sugar

1/4 tsp basil, dried

1/8 tsp garlic powder

1/8 tsp oregano

salt and pepper

Whisk all ingredients together and chill before serving.

Notes:

Bolognese is a hearty meat sauce that is typically cooked for hours. This is a quicker version but the trick is to use good canned tomatoes. I prefer San Marzano tomatoes. I buy mine at The Fresh Market and they can be found in the italian specialty section at the grocery.

A heartier pasta works best with this sauce. I use pappardelle but a tubular pasta like penne or rigatoni would also work well.


Lou loves tacos

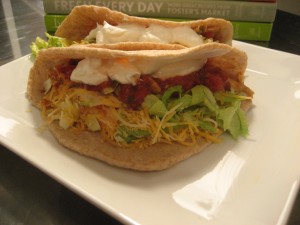
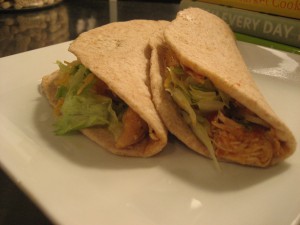
Spicy Chicken Tacos

Bless her heart, Lou is our rescue dog from College Station, Texas. While my husband was an intern at the veterinary hospital, he ran across Lou who had been hit by a car on a busy highway and brought into the hospital by a good samaritan. She underwent numerous surgeries, physical therapy and was used as a teaching case for the hospital. A cranky little dog, she earned the nickname ‘bad sam’ and with that my husband was smitten. We brought her home, carrying her up the stairs and telling our other dog to be nice to the fragile, cranky, little dog.

Not much perked her up until one day I was in the kitchen making tacos. She waddled over to me, sat at my feet sniffing, hoping a taco would drop to the floor. Sharing a little of the taco with her, we became fast friends and to this day anytime tacos are being cooked up, Lou is right at my feet.

Recipe:

1 1/2 to 2 lbs boneless chicken breast

1 tbsp canola oil

1 clove garlic, minced

1/2 jalapeno pepper, diced

1/4 cup green bell pepper, sliced into thin strips

1/4 cup onion, sliced into thin strips

1 can Rotel, pulsed in blender

2 cups low-sodium chicken broth

1 tsp ground cumin

1/2 tsp paprika

1 tbsp cornstarch

Heat oil in a large frying pan (one with a lid), add chicken and brown on each side. Remove from pan and set aside. Add onions, peppers and jalapeno and cook until tender about 5 minutes. Then add garlic and cook for a minute more.

Deglaze pan with chicken broth, stirring up all of the brown bits from the bottom. Cook for about 5 minutes and then add Rotel and spices, stirring well.

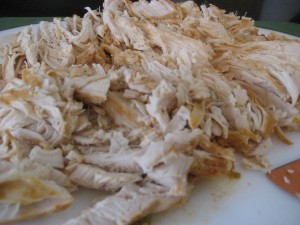
Add chicken back to pan, cover with lid and simmer on low to medium-low heat for one hour. After cooking, remove chicken from pan and shred with fork and set aside.

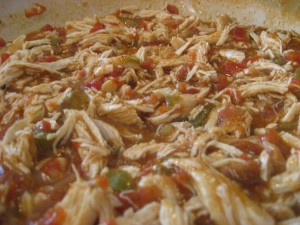
Turn heat back up to medium-high. Take out a few spoonfuls of the broth mixture and place in a small bowl, mix in 1 tbsp of cornstarch. Add the cornstarch mixture back into the pan and stir well until sauce thickens. Add chicken back to sauce a continue heating for 15 minutes before serving.

Notes:

Serve with your favorite tortillas, lettuce, cheese and sour cream. The chicken is also a great filling for burritos or on top of a salad.

I attempted to make my own flour tortillas for this dish but still haven’t perfected them – I’ll let you know when I do!

Now days, Lou is happy, healthy and still a little cranky but she spends most of her day hovering over the baby and barking at the mail man.


Not Your Nana’s Green Beans

Not Your Nana’s Green Beans

Meat and three week is back in action! Yesterday was spent in a dark, cold house with a 10 month old and three dogs thanks to the ice storm that whipped through Columbus. So here we are at perfect green beans to go along with our meatloaf and mac and cheese.

Until I was well into my twenties, I never ate anybody’s green beans but my Nana’s. Freshly snapped, cooked all day with a big piece of salt pork, they were the real deal.

A few years ago, after I had gotten past only eating Nana’s green beans, my mom let me in on a little secret. Those green beans weren’t always cooked the long hard way – there was a secret and its a good one.

You only need two ingredients to make green beans that look and taste like they have been cooking all day. Frozen green beans, beef bouillon and that’s it! My mom says this is an old Weight Watcher’s way of cooking green beans without any added fat. Follow this secret and you will fool even the pickiest of green beans connoisseurs.

Recipe:

2 – 12 oz bags frozen green beans, italian cut

8 cups water

2 tbsp Wyler’s beef granules

In a large pot, combine green beans, water and beef granules. Bring to a boil and then reduce heat so that there is a steady simmering boil. Cook for one hour or longer. If water gets too low add more.

It’s that easy and the longer you cook them, the better they taste!

Notes:

You can used canned green beans just be sure to rinse and drain them before cooking.

Texas taught me…

Balsamic Marinated Flank Steak

I have had a love affair with Texas my whole life. It started early on with Bud and Sissy in Urban Cowboy. This was way back when HBO only played two movies all day and I would sit in my jeans tucked into my boots on the arm of the sofa enamored by Gilley’s.
I remember my dad took a business trip to Houston around this same time and all I asked for was a Gilley’s t-shirt. Sure enough he delivered and that shirt hardly ever left my body!
So I eventually got the chance to move to Texas. Here are some lessons I learned:

Girls drive trucks – real big ones and they look cool driving them!

Designer jeans aren’t just for clubbing – showing cattle is a very dressy affair. On my first trip to the Houston Livestock Show & Rodeo, I stopped in the restroom and saw dozens of teenage girls decked out in designer jeans, shiny belts,  flat-ironing their hair and primping for their turn to show.

Goats aren’t just for petting zoos – I worked at the Brazos County Expo Complex where we hosted many livestock shows. During one of my first shows I became taken with the goats. They were so cute and I had a few favorites until I looked up at the sign where it advertised ‘meat goats’. It was then I learned all about livestock shows.

You never meet a stranger, Texans are super friendly. You can make a lifelong friend standing in line at the grocery store.

Get to know your beef. My boss was a wonderful man and he taught me a lot but the lesson above all others was to choose good beef. He was a cattle rancher in his spare time and when I sat down to enjoy a burger at lunch he would begin his cattle stories and why he only ate his beef –

 Recipe:                                                                 

1 1/2 lb flank steak

1/8 c olive oil

1/3 c balsamic vinegar

2 tbsp honey

1 tbsp Dijon or stone ground mustard

2 tbsp fresh parsley, minced

1 clove garlic, minced

1 tbsp lemon juice

salt and pepper

Place meat in a large Ziploc bag. Combine remaining ingredients, whisking together well. Pour over the meat and place in the fridge for at least 8 hours.

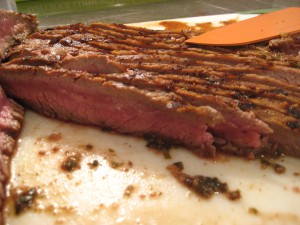
Before cooking meat, set out the Ziploc bag and let it come to room temperature. Heat a grill pan, grill or heavy skillet to high heat. Place the steak on the heat and do not move for 4 minutes. Once 4 minutes has passed, flip the meat and cook for another 4 minutes not disturbing the meat.

Once cooked, remove from pan or grill and place on a cutting board letting the meat rest for at least 5 minutes before cutting. Cut across the grain into thin slices for best result.

   Notes:

 Flank steak is a lean cut of  beef and requires a little more attention. Cooking at a high temperature seals in the flavor and allowing the meat to rest will hold in the juices.

If you have leftovers, you can make a great steak taco !

I used my Cuisinart indoor grill for this recipe.

Birthdays are like Potatoes

Potato Gratin

So yesterday was another birthday. When you get to the point like I have and your birthday means being over the hump of mid-thirties and on your way to 40 celebrating is a lot less of a fuss. So I spent the day with my two boys (grown and not), went to lunch and did some shopping.

As I oohed and aahed in Sur La Table, I thought what a difference this is from turning 21 when all you could wait to do is run to the nearest convenient store at midnight and buy beer – all I wanted at 36 was to indulge in a Le Creuset! And then I thought potatoes – they’re a lot like birthdays. You can jazz them up or make them simple. Have a low fat version or go over the top and indulge…the possibilities are endless.

So in the end I choose a lovely baking dish and came home on mission to create a low fat, easy and a little bit exciting birthday, oh I mean potatoes!

Recipe:

1 1/2 lbs yukon gold potatoes

3/4 c fat-free evaporated milk

3/4 c low sodium chicken broth

1 tbsp all-purpose flour

3 cloves garlic, minced

3 tbsp fresh parsley, minced

3 tbsp parmesan reggiano, shredded

salt and pepper

Preheat oven to 375 degrees.

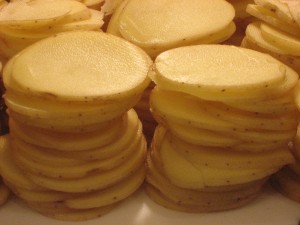
Wash and dry potatoes and then thinly slice, preferably with a mandoline.

In a small saucepan, add evaporated milk, chicken stock and minced garlic then whisk in flour. Heat slowly over medium-low heat until it is just warm.

Spray a baking dish with canola oil spray. Take 1/3 of the potatoes and layer, overlapping in the bottom of the dish. Season the potatoes generously with salt and pepper, then sprinkle 1 tbsp each of parmesan cheese and parsley. Pour 1/3 of the milk mixture over the potato layer and then repeat this process two more times.

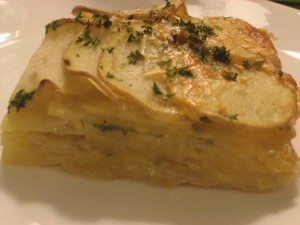
Cover baking dish with foil and bake for 35 minutes. Remove foil after 35 minutes and continue baking for 35 more minutes. Top should be golden brown. Remove from oven and let stand for 5 minutes before cutting.

This is not your typical potato gratin. It is not bathed in cheese and butter like traditional recipes. This dish is more a take on a Potatoes Savoyard which uses chicken broth and no cream.

Great Finds at Sur La Table


Oil Mister – just add you own oil, give a few pumps and say goodbye aerosol cans.


Probably the best $20 I’ll ever spend on a kitchen gadget. I had a mandoline but this sleekslice mandoline is compact, folds up and has a finger guard!

Here we go…

 
Healthy Turkey Chili with Jalapeno-Cheddar
 Cornbread Croutons

 Being from Tennessee and after living many years in Texas – I have learned my way around a bowl of Chili! And since it is a cold Ohio winter, I can’t think of a better way to introduce my first recipe adventure.

I like chili with beans it just adds more texture than the all beef version. Using lean ground turkey breast makes this  delicious lowfat version. You can use the regular ground turkey with the 93/7 fat content but I was going for a super lean bowl of chili.

And of course for those of you who like more heat – just add more cayenne until you get it where you want it. Eyes watering and nose running!


Recipe:

Cheddar-Jalapeno Cornbread Croutons

2 cups self-rising cornmeal

1/2 cup all purpose flour

1/4 cup sugar

2 cups lowfat buttermilk

2 tbsp canola oil

2 jalapenos, seeded and diced

1/2 cup lowfat (2%) sharp cheddar cheese, shredded

Preheat oven to 350 degrees.
Mix together first 5 ingredients until well blended. Then add in jalapenos and cheese.

Pour into a loaf pan prepared with non-stick spray.

Bake for 55 minutes to 1 hour. The bread will pull away from the sides when it is done – and it never really gets brown on top.

You can make this a day ahead for the croutons.
Croutons:

Cut bread into 1 inch x 1inch pieces and toast on  a baking sheet in a 400 degree oven for 5-8 minutes until toasty.

Recipe:

Healthy Turkey Chili

1 tbsp. canola oil

1/2 large sweet yellow onion, finely chopped

1 clove garlic, minced

1 lb lean ground turkey

salt and pepper

3 tbsp chili powder

1 tsp ground cumin

1/4 tsp paprika

1/4 tsp cayenne pepper

1 tbsp tomato paste

1 tbsp worcestershire sauce

1 – 14.5 oz can crushed tomatoes

1 – 15 oz. can kidney beans, rinsed and drained

1 – 15 oz. can white beans, rinsed and drained

1 cup low sodium chicken broth

3 cups low sodium tomato juice

In a large, heavy soup pot heat oil over medium-high heat, add onions and cook for two minutes or until tender, add garlic and cook for 1 minute longer.

Add turkey, salt and pepper to taste and cook throughly.

Add spices, tomato paste and worcestershire sauce to the cooked meat and stir to make sure spices are worked in and then add the rest of the ingredients, stirring well.

Let chili simmer on low heat for 1 hour.

Top with Jalapeno-Cheddar Cornbread Croutons!